
Depth Spelunking Guide: Tasks, Entities, and Boss Survival
Learn lobby routes, task controls, entity counters, and boss survival tactics with this evidence-based Depth Spelunking guide.
This Depth Spelunking guide covers where to start, how to complete key tasks, and how to respond to different entities. Survival depends on identifying what triggers each threat: sound attracts Warden, movement during detection triggers Gazer, and an active flashlight draws the Projected Husk. Lobby and task details follow the supplied verified knowledge base; entity behavior comes from TRE_MONSTER’s community guide, with the version not independently confirmed.
Start in the Lobby
The Lobby is the safe hub between delves, with shops, NPCs, and access to the Elevators. From the Main Lobby, use these routes:
| Direction | Destination |
|---|---|
| Right | Shop and an intermediate room connecting to Storage |
| Left | Library and an intermediate room connecting to The Deep Dive Cafe |
| Front | Elevators |
| Back | Outside |
The Library contains the Lobby Terminal, where you can review recorded progress in the Atlas and Bestiary. The supplied Atlas entry lists 90 floors plus eight additional non-canon floors.
Unlocking the Outside requires activating nine red buttons. Three are in the Main Lobby area: one beside the Outside gate and one in each intermediate room connecting toward Storage and The Deep Dive Cafe/Library. The supplied material does not identify the remaining six locations.
Complete Tasks Without Avoidable Failures
Calibrator: follow the light and sound
The Calibrator requires moving four sliders into their correct positions. Watch the light on the right: it becomes brighter and whiter as a slider approaches the correct spot. A static sound also grows louder.
- PC: Left-click and drag each slider.
- Mobile: Tap and drag.
- Console: Use the cursor, hold A on Xbox or X on PlayStation, and drag.
This task cannot fail, and you can leave it unfinished and return later during the floor.
Coordinator: enter coordinates in order
The Coordinator uses a 7×7 grid, with A–G vertically and 1–7 horizontally. The red pin begins at D4.
Read the three target coordinates at the top, then move the pin to them in order, starting with the leftmost target. Moving to a later target prematurely fails the task and resets progress, although the target coordinates remain unchanged.
Use WASD on PC, drag the pin on mobile, or select and drag it with the console cursor while holding A on Xbox or X on PlayStation.
Explosive Generator: failure has lasting consequences
The Explosive Generator is a black, more difficult Generator variant. Failure causes an explosion dealing 50 damage, ragdolls the Delver, and applies Brain Damage, Broken Leg, Broken Ribs, Dislocated Shoulder, and Ruptured Eardrums.
The supplied mobile control is to tap when the arrow enters the red area. PC and console controls are not provided in the reference material.
Entity Counters: Identify the Trigger First
The following counters are reported in TRE_MONSTER’s entity guide. They are community observations rather than official documentation.
| Entity | Reported behavior | Practical response |
|---|---|---|
| Drone | Slowly approaches players; nearby sounds include whirring and beeping. | Keep your distance and avoid contact. |
| Warden | Blind, fast, and sensitive to footsteps, task completion or failure, certain items, and in-game voice chat. | Crouch and move away from the location where you made noise. |
| Lung Warts | Uses sight rather than hearing and fires a slowing projectile. | Break line of sight, especially after being hit. |
| Mimic | Can copy a co-op player, use text chat, and flash its flashlight before chasing. | Treat copied appearance as insufficient proof of a teammate’s identity; break sight when threatened. |
| Skinless Mimic | Has wet footsteps and attacks on sight. | Listen for its approach and avoid exposure. |
| Gazer | Has long-range, all-around detection and highlights a player before chasing. | Stop moving during the highlighting phase. If chased, break sight; pursuit reportedly takes a few seconds to end. |
| Lurker | Has a short aggression range and makes footsteps and occasional grunts. | Leave space around it rather than approaching. |
| Shrier | Contact causes a scream that alerts sound-sensitive entities and immobilizes the player for six seconds. | Avoid contact, particularly when Warden is nearby. |
Twins: account for their position swap
The creator describes Yin as the dark twin, with longer detection range but slower movement. Yin’s daggers knock targets back and ragdoll them. Yang, the light twin, detects at shorter range but moves faster, and her daggers inflict slowness.
They reportedly exchange positions approximately every 35 seconds. A route that keeps you away from one twin can therefore become dangerous after a swap.
Rare threats: items, consumables, and flashlights matter
The video describes several rare encounters with different counters:
- Teratoma: Places traps that temporarily prevent consumable use. Triggering a trap draws a brief response, especially if the entity is close.
- Salesman: Behaves like Drone despite its different appearance and sounds.
- Apolon: Consumes items to become stronger and faster. Its black locust attack drains four stamina per second, but the creator reports that the projectile is dodgeable and Apolon slows while firing.
- Projected: Combines a Husk and a Soul. Keep your flashlight off around the Husk, which chases players using one. Stay away from the Soul: proximity applies a slowing cold effect, and contact kills.
If the Projected pair meet, the creator reports a floor-wide effect that slows players while temporarily increasing entity speed and detection range.
Console and Other Unusual Entities
Console’s danger depends on the terminal upgrades active during the run. According to the video, upgrades can give it additional speed, battery-draining effects, or stronger detection.
Some particularly relevant interactions are:
| Upgrade | Reported Console effect |
|---|---|
| Supply Drop | Starts the floor with a +5 speed boost that decays over two minutes. |
| Task Siphon | Task completion drains 10 battery from the completing player and grants Console +0.1 speed. |
| Power Saving | Drains one battery per second from a player it is chasing until pursuit ends. |
| Terminal Expansion | Activating an upgrade terminal draws Console to it with +5 speed during travel. |
| Recycler | Consumable use grants +0.25 speed for five seconds; speed and duration can stack. |
| Reboarding | The countdown grants +3 speed and increases aggression range by 50. |
The creator also speculates that Console may track players automatically during the countdown, but explicitly expresses uncertainty. Treat that behavior as unconfirmed.
Witness and Smile create a different problem: multiplication. Witness reportedly has a 1-in-25 duplication chance every 25 seconds, and its copies can also duplicate. Smile duplicates on a kill.
Conditional Encounters to Know Before Descending
Some entities are tied to player actions or progression rather than ordinary encounters.
Hatman: The creator reports a trigger of 90 or more fear sustained for over 90 seconds. It passes through walls and threatens the players who meet its conditions.
Joker: Reportedly summoned through a Deck of Cards, with a 1-in-101 chance. Its reported walk speed is 31.
Timekeeper: A maintenance challenge can occur while skipping floors. The video gives a requirement of 15 tasks plus 10 per player in under three minutes; failure summons Timekeeper. It continually gains speed, while approaching it slows the player.
Dealer: Leaving its shop floor without buying anything can reportedly cause it to appear as a hostile entity on later floors. Its bullets ragdoll players.
Sloth: The creator connects its appearance to prolonged task inactivity and reports that power outages increase its speed, up to 55. The transcript’s exact solo and co-op trigger formulas are ambiguous, so they cannot support a reliable countdown calculation. Keep task participation consistent rather than relying on an inferred timer.
Floor 20 and Boss Encounters
Envy: collect 13 clipboards
According to the video, floor 20 requires facing the Sin of Envy and collecting 13 clipboards from bodies around the map.
Use walls to avoid exposure to Envy. If caught in a flower, repeatedly use interact to escape. The creator describes her spear as especially dangerous, making cover central to this encounter.
Sound-sensitive boss
The video describes a boss whose behavior resembles Warden’s. Completing the floor’s larger generators briefly distracts it: it moves to the completed generator and destroys it.
Smaller versions can scream when triggered, revealing your location to the boss, but reportedly do not apply Shrier’s stun.
Mannequin boss
The creator distinguishes mannequins by underwear color:
- White: Harmless.
- Red: Moves after you when you are not looking at it.
Before starting a task that fixes your camera angle, check for red mannequins nearby. During Generator tasks, the creator recommends keeping the camera pointed toward them. When the lights shut off, red mannequins relocate, so reassess their positions afterward.
Gameplay Video Reference
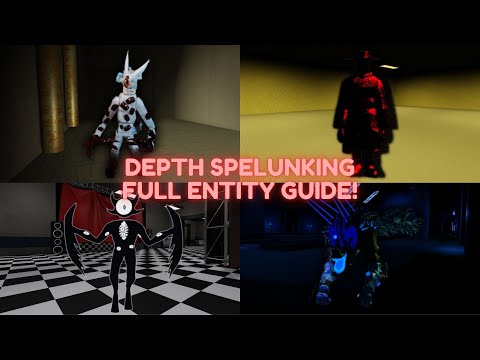
Gameplay video reference: TRE_MONSTER — Depth Spelunking Full Entity Guide! | All Monsters Explained
The supplied video supports the entity guidance above, but its collection date does not establish that every mechanic remains current. Exact Sloth trigger formulas, Console’s suspected automatic tracking, and the current game version remain unconfirmed.
Related Guides
Depth Spelunking Controls: Confirmed Task Inputs
Confirmed Depth Spelunking task controls for PC, mobile, and console, plus puzzle instructions and the keybinds still unverified.
Depth Spelunking Ghost Abilities: What the Source Confirms
What is known about ghost abilities in Depth Spelunking, including the Soul’s cold effect, the Husk, and Hatman’s movement.
Depth Spelunking How to Revive: What the Evidence Confirms
Reviving is not explained in the available source. Learn what Broken Wings, Divine Intervention, and Holy Mantle actually do.
Depth Spelunking Secrets: Lobby Hub, Hidden Areas, and Unlocks Guide
Discover the hidden secrets of Depth Spelunking, including how to unlock the Outside, find the Black Market, and explore secret areas like .vbp.