
Depth Spelunking Solo Guide: Preparation, Tasks, and Floor Skips
Plan a Depth Spelunking solo run with early looting, task mechanics, and floor-skip lessons from a community run titled 140 floors.
A Depth Spelunking solo run is possible: Computer Parts Gayming documents one in a video titled “I Reached 140 Floors Solo in Depth Spelunking.” The creator’s approach was to loot early, search for terminals to obtain upgrades, and reserve floor skips for especially difficult situations. That provides a useful community example, although the supplied transcript does not establish an optimal build, a guaranteed route, or current leaderboard requirements.
What the solo run demonstrates
The community gameplay video follows an attempt to reach the leaderboards completely solo. The creator says the attempt did not achieve that goal and explicitly states that they were not using the “mouth speedrun strat,” because they were not confident performing it alone.
The video’s title reports 140 floors. However, the supplied transcript is truncated before the ending, so it does not establish the final encounter or how the run ended. Treat the strategies below as observations from this particular attempt. Version not independently confirmed.
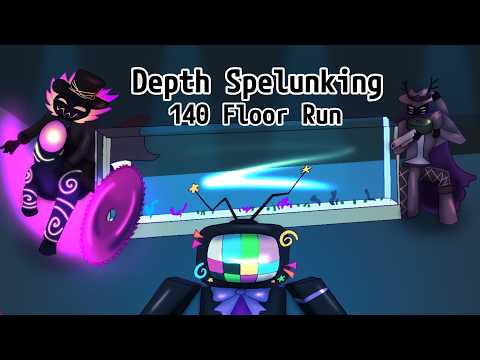
Gameplay video reference — Computer Parts Gayming, “I Reached 140 Floors Solo in Depth Spelunking.”
Prepare in the Lobby
The Lobby is the safe hub between delves, with access to shops, NPCs, and the elevators used to begin a delve. From the Main Lobby, the front doorway leads to the Elevators, while the left side provides access to the Library.
Before attempting a longer solo run, review your recorded floor information through the Atlas. The Lobby Terminal in the Library lets Delvers view their Atlas and Bestiary progress. This provides a place to check recorded discoveries before returning to the depths; the supplied material does not establish any particular Atlas completion requirement for solo play.
Early floors: loot and look for terminals
The creator deliberately spent the early game collecting loot. Their reasoning was that later floors would offer fewer comfortable opportunities to search while dealing with threats.
A preparation-focused approach drawn from that run is:
- Search manageable early floors for loot. The creator used this stage to gather resources before encounters became more demanding.
- Check for terminals during exploration. They repeatedly searched floors for terminals to obtain upgrades as early as possible.
- Consider available pit stops. Later in the early portion of the run, the creator began selecting pit stops whenever the terminal offered them, seeking loyalty card stat boosts and useful purchases.
The transcript does not provide a complete upgrade order, exact loyalty card bonuses, or a recommended shopping list. It supports prioritizing early preparation, but it cannot establish which upgrade or purchase is best for every solo attempt.
Exploration also carried immediate risks: the creator accidentally stepped into a bear trap and suffered other early setbacks. More searching should therefore be weighed against the hazards encountered on that floor.
Learn task rules before committing
The supplied task information gives several concrete ways to avoid preventable mistakes during solo progression.
Calibrator: use both cues and return if needed
The Calibrator requires moving four sliders into their correct positions. The light on the right becomes brighter and whiter near the correct position, while the static sound grows louder.
This task cannot be failed, and it can be left unfinished and completed later during the same floor. That makes interruption an available option when continuing the task would expose you to a nearby threat.
On PC, left-click and drag the sliders; on mobile, tap and drag. Console controls use the cursor while holding A on Xbox or X on PlayStation.
Coordinator: complete coordinates in order
The Coordinator uses a 7×7 grid, with A–G vertically and 1–7 horizontally. Its red pin starts at D4.
Move the pin to the three displayed coordinates in order, beginning with the leftmost target. Moving to a later target out of sequence fails the task and resets progress, although the target coordinates remain unchanged. Read the entire sequence before moving so that a later target does not become an avoidable reset.
Explosive Generator: account for the failure penalty
The Explosive Generator is a black, harder Generator variant. Failure causes an explosion that deals 50 damage, rag-dolls the Delver, and applies Brain Damage, Broken Leg, Broken Ribs, Dislocated Shoulder, and Ruptured Eardrums.
Those consequences make an attempted completion a significant risk. The supplied controls confirm that mobile players tap when the arrow reaches the red area; they do not establish a universal timing shortcut.
When to use floor skips
The creator initially planned to use skips only when necessary. Their first skip came after a floor where repeated threats made meaningful progress difficult. Later, they skipped another floor after identifying a combination involving Bullseye, Echo Vore, and Channel, alongside other possible threats.
The useful decision point is whether you can still make progress at an acceptable risk. In this example, skips were responses to specific situations rather than a fixed floor schedule.
The supplied evidence does not establish skip costs, availability rules, or an ideal number to save. It also does not explain the mouth strategy sufficiently to teach it or compare its efficiency with this approach.
Avoid relying on lucky encounters
Several moments in the run show why a successful escape should not automatically become a repeatable tactic. The creator tried a wall maneuver against Bullseye that had worked earlier, but it failed on a later attempt. They also observed entities getting stuck on scenery and survived some apparently close detection situations.
These are individual gameplay observations, not confirmed rules for cover, detection, or pathfinding. Use the video to study the situations, but do not assume a particular wall or an entity’s temporary obstruction guarantees safety.
Finally, account for the length of the attempt. The creator explicitly described exhaustion affecting decisions and later reported severe sleep deprivation. They also took an extended break in the dealership. For a long solo attempt, the supported lesson is to recognize declining concentration before it influences task execution or skip decisions; the footage does not establish a universal safe pause method.
Related Guides
Depth Spelunking Controls: Confirmed Task Inputs
Confirmed Depth Spelunking task controls for PC, mobile, and console, plus puzzle instructions and the keybinds still unverified.
Depth Spelunking Ghost Abilities: What the Source Confirms
What is known about ghost abilities in Depth Spelunking, including the Soul’s cold effect, the Husk, and Hatman’s movement.
Depth Spelunking Guide: Tasks, Entities, and Boss Survival
Learn lobby routes, task controls, entity counters, and boss survival tactics with this evidence-based Depth Spelunking guide.
Depth Spelunking How to Revive: What the Evidence Confirms
Reviving is not explained in the available source. Learn what Broken Wings, Divine Intervention, and Holy Mantle actually do.